


This documentation will guide you through how to manage your CogniTech Systems Photo Gallery categories. Categories are a way of categorizing your photos. You can create top-level and secondary-level categories providing granular control over the categorization of your content.
To locate your photo gallery categories, first log in to TMS. Once logged in you will see the Photo Gallery menu in the navigation under WEB SYSTEMS, in that menu click on Categories which will take you to the categories page.
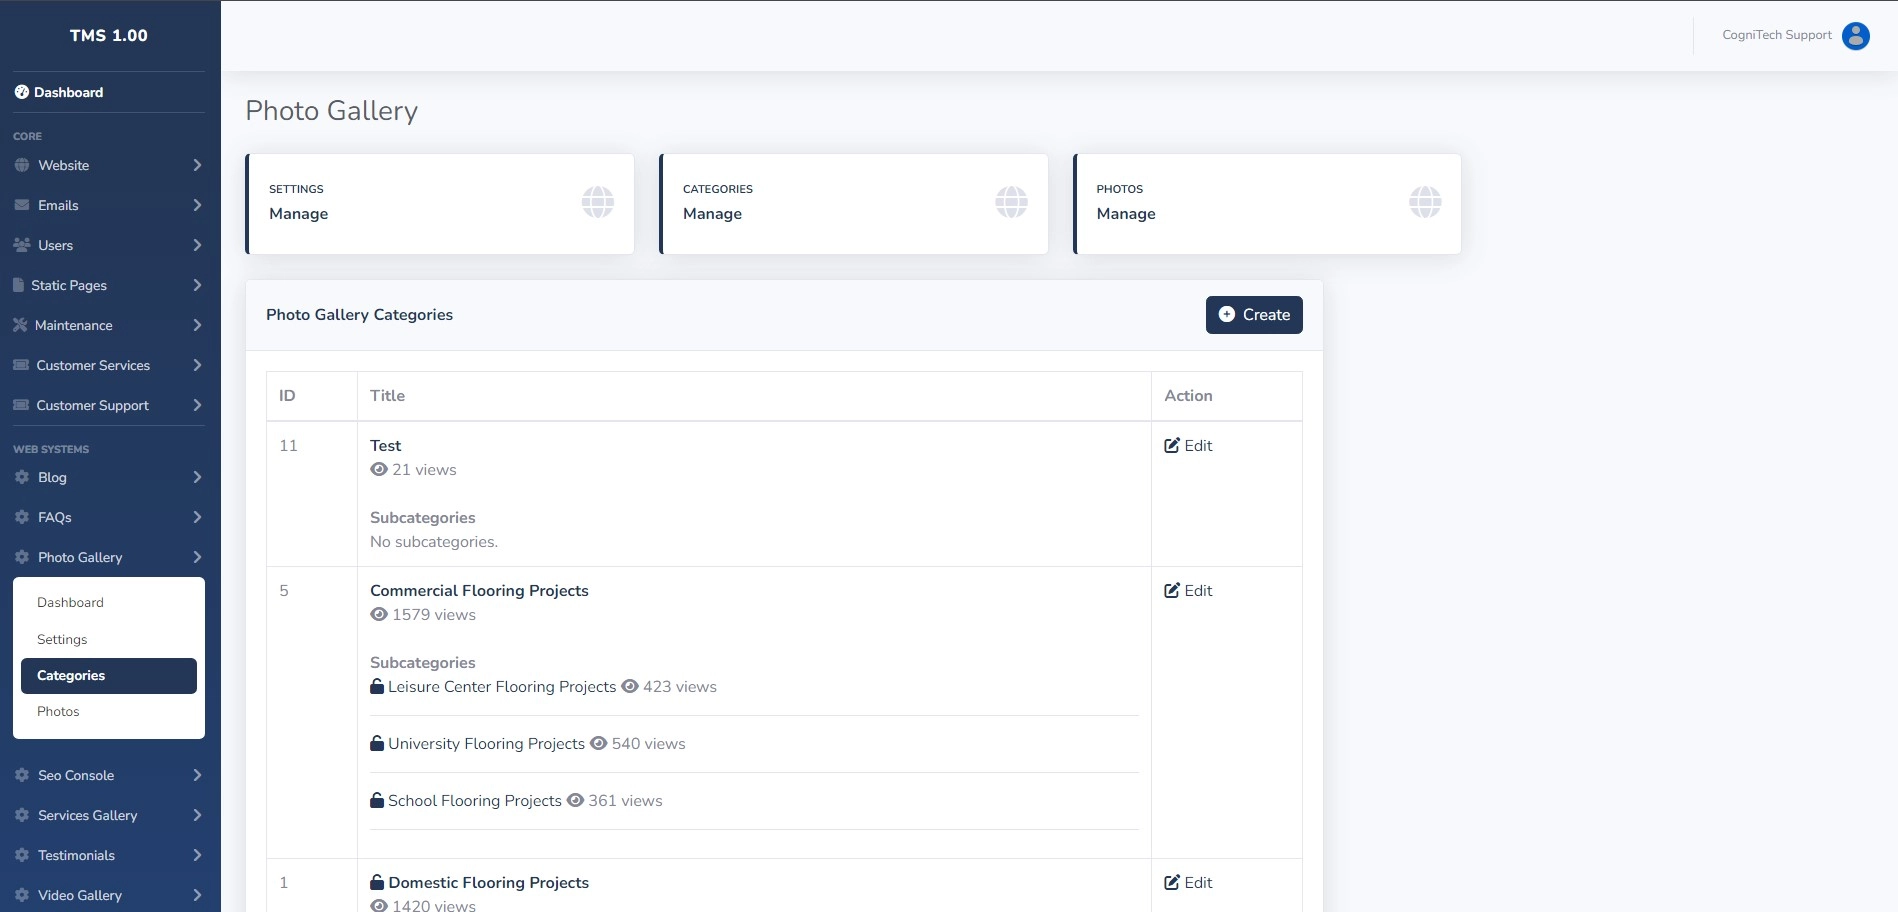
You can access all existing photo gallery categories from the categories page, this page will show each top-level category and their respective secondary-level categories.
Customers are able to create unlimited photo gallery categories, with the only restriction being the disk space used to store the information in the database and the photos.
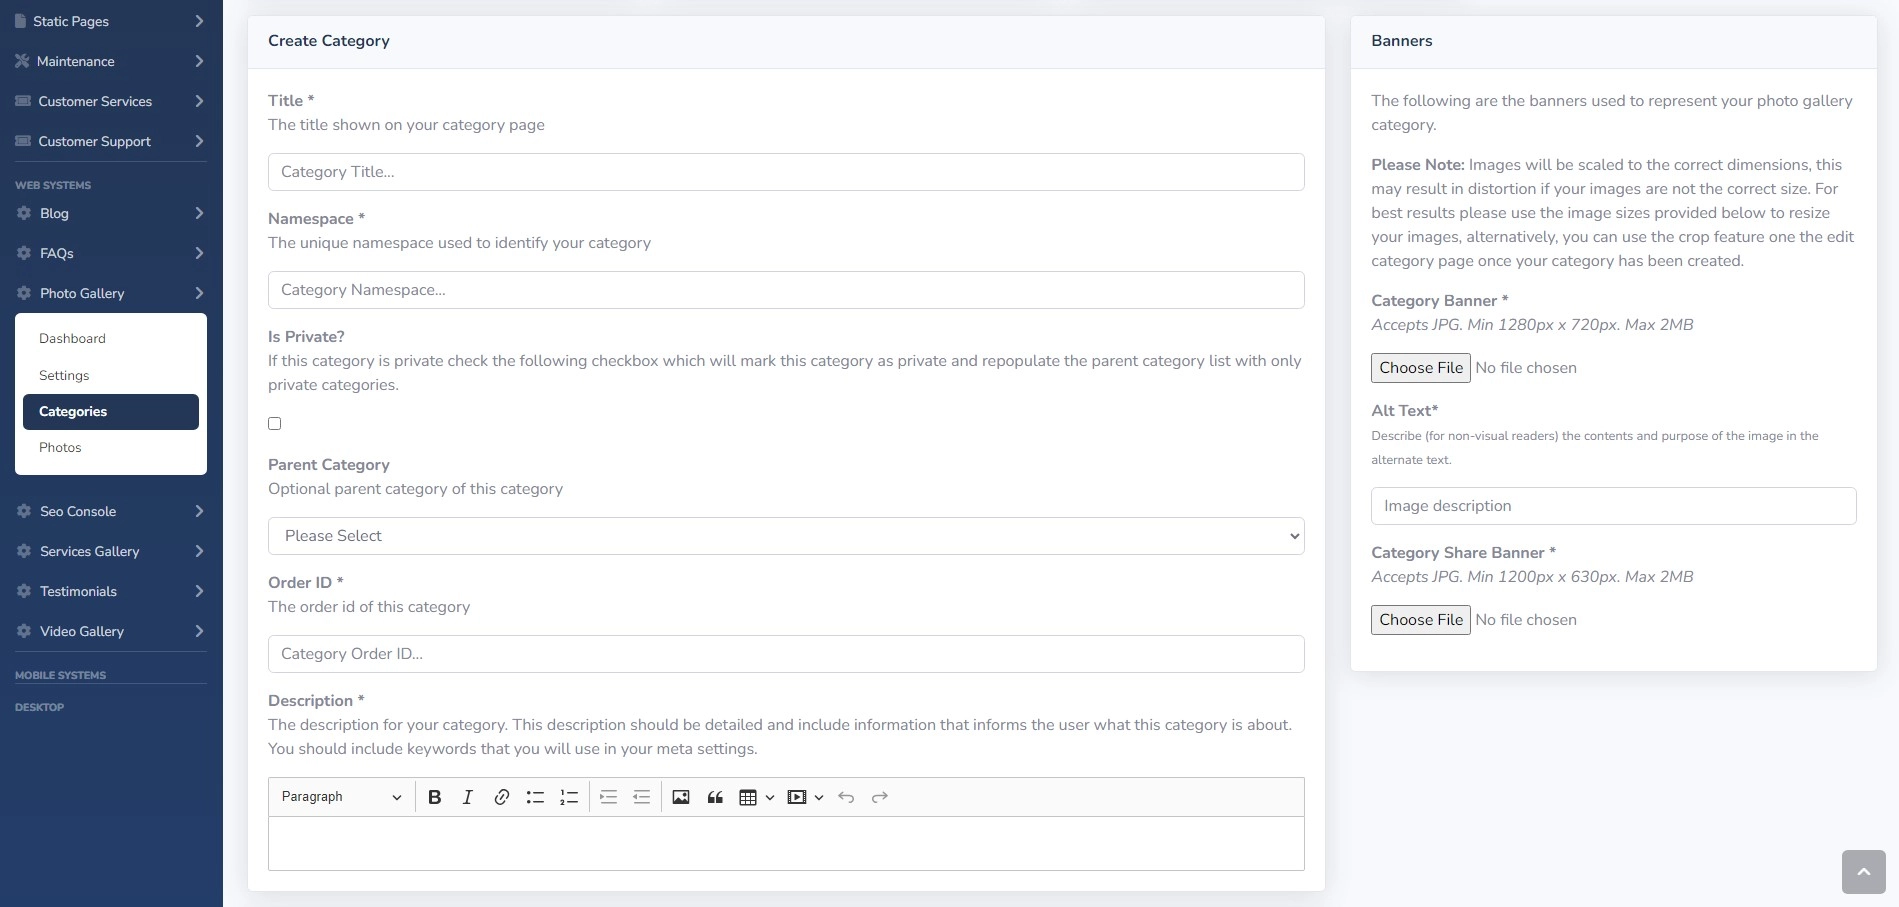
To create a new photo gallery category, head to the Categories tab of the Photo Gallery system and click on the Create button, this will take you to the page that allows you to create a new category.
The title is the title that will be displayed on your photo gallery category. You can call your photo gallery whatever you like, however, it is best to call it something relevant to what the category is about, giving clear information about what the photo gallery category is about.
The namespace is a unique identifier for your category, it will make up part of the address the people use to access the page on the internet. This namespace also helps search engines understand what your category is about. The address format for photo gallery categories is: yourdomain/photo-gallery/your-category.
Lets say you have a photo gallery category called Domestic Flooring Projects, to allow the search engines, and users to know what this page is about a good namespace could be domestic-flooring-projects. When choosing your namespace you should not use spaces or special characters, and you should not use stop-words.
Customers are able to create private categories, these categories are visible in TMS, but are not visible on your website.
You can make your new category a sub-category of an existing category, to do so select the parent category in the parent category dropdown menu.
The order id specifies the order in which your categories are shown.
The description is the text that will be shown on your photo gallery category. This description should be detailed and include information informing the user about your photo gallery category. You should include keywords that you will use in your meta settings.
A meta title is a short and descriptive title for a web page. It appears as the main heading in search engine results. It helps users understand what the page is about and encourages them to click on the link to visit the page.
The meta title you use should clearly describe what your photo gallery category is about and must be no more than 60 characters.
A meta description is a brief summary of a web page shown in search results. It helps users understand the page's content and encourages clicks to the site. It should accurately reflect the content of the page and encourage users to visit by highlighting key information or benefits.
The meta description you use should clearly describe what your photo gallery category is about and must be no more than 160 characters.
Meta keywords are a list of comma-separated words or phrases that describe a web page's content. They used to help search engines understand the page, but are no longer used for ranking.
The banners section can be found at the top right of the page and allows you to upload the primary banners that will be used to represent your photo gallery category. There are two types of banners you can upload, the Category Banner and the Category Share Banner.
Category Banner
The category banner is the main banner that will be displayed on your photo gallery category page . This banner should be a JPG, and should be a minimum of 1280px x 720px, and less than 2mb in total.
Category Share Banner
The category share banner is the image that will be displayed when people share your photo gallery category on social media. This banner should be a JPG, and should be a minimum of 1200px x 630px, and less than 2mb in total.
Uploading Your Banners
You can choose your photos to upload by clicking on the Choose File button, this will open your file navigator and will allow you to navigate to the location of your chosen photo. When you create a new category the photos are automatically resized to fit the required size, this may lead to unwanted cropping so you are able to edit and crop the images on the edit category page.
Alt Text
Alt text is used to describe (for non-visual readers) the contents and purpose of an image. This text is required for accessibility and you can actually get fined for not doing it correctly. Ensure that your alt text describes the image that you are uploading, allowing non-visual readers to know what the image is about.
Once you have filled out all of the required fields click the Create button at the bottom of the page. If you have forgotten to add some required information or there is a problem with your images, the system will tell you so. It is important to remember that until a category has been successfully created the data you enter is not saved.
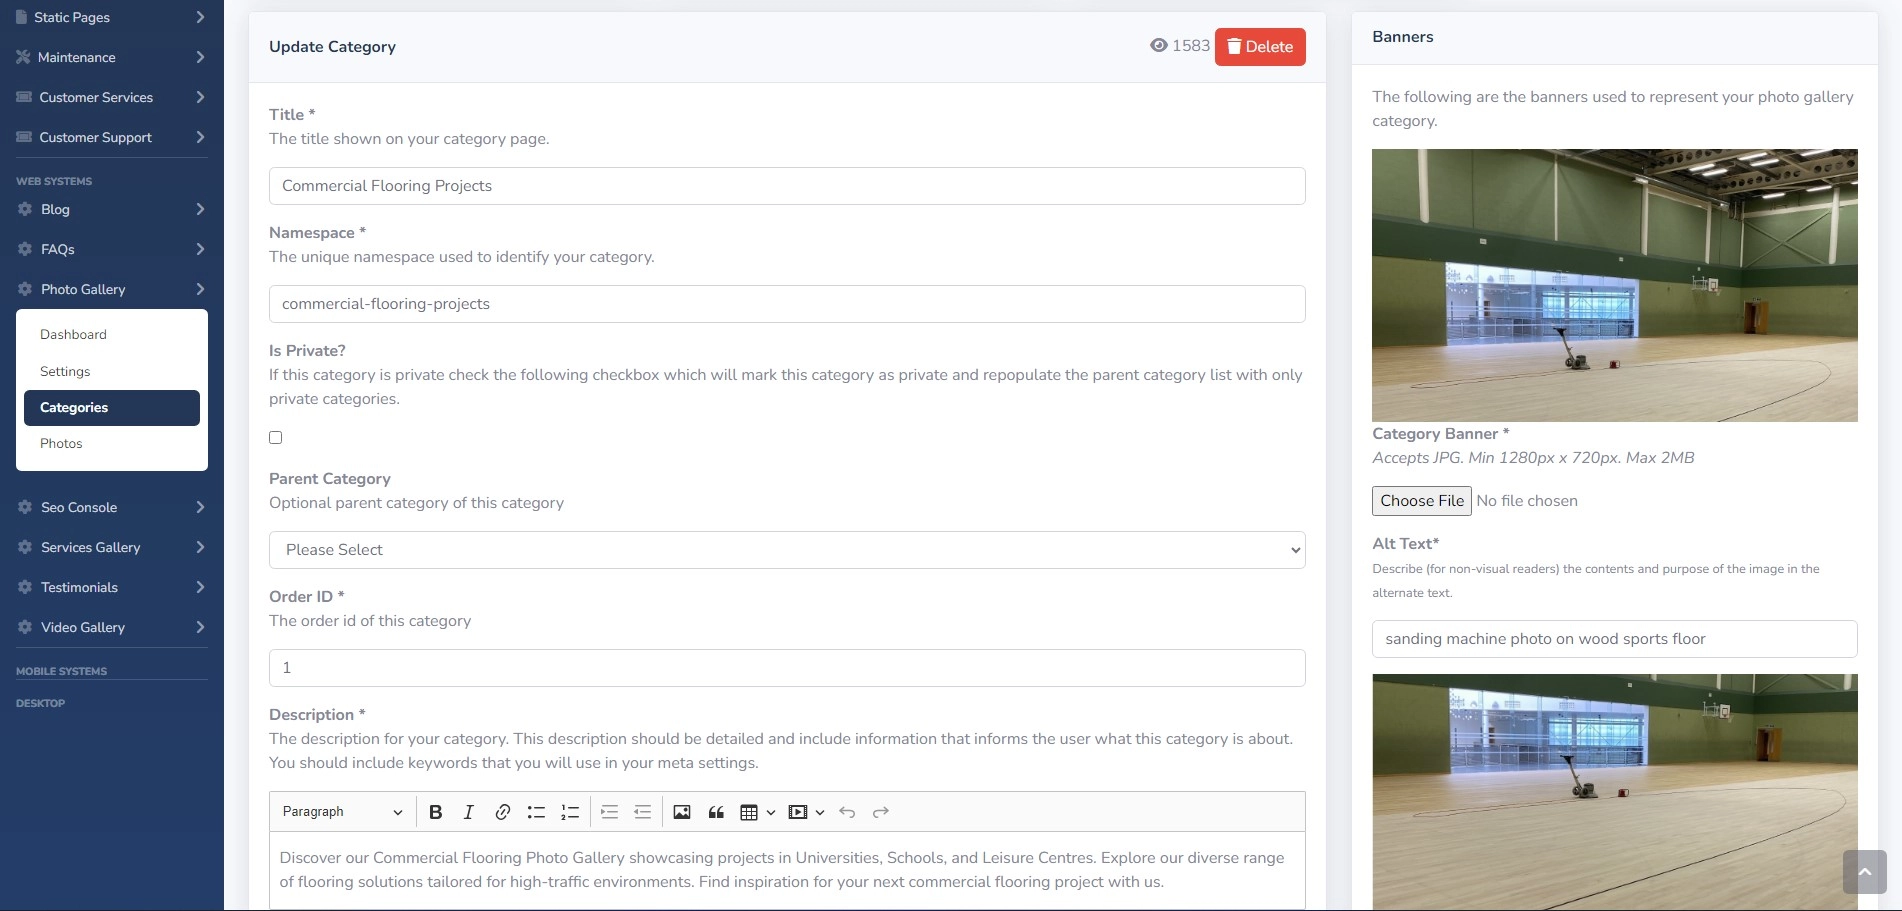
You can edit both top-level categories and secondary-level categories. To edit a top-level category click on the Edit button in the Action column. To edit a secondary-level category click on the relevant subcategory.
The settings for your existing photo gallery categories are the same as the settings explained above.
It is important to note that changing the namespace or parent category of a category can have unwanted effects. If your page is already indexed in the search engines they will be linking to your page using the address which is made up of the parent category namespace (if relevant) and the namespace of the category, Changing either of these settings will mean that any links pointing to your category will now be broken and users will be redirected to a page not found error page. This is equally true for shares of your category on social media and any bookmarks that your visitors have saved.
You can choose your photos to upload by clicking on the Choose File button, this will open your file navigator and will allow you to navigate to the location of your chosen photo. Once you have chosen your photo the crop feature will open allowing you to choose the selection to be used. This feature keeps the aspect ratio locked ensuring that your photo does not stretch. You will need to select the area you want to use for your banner and then click Crop before you can continue. Once you click crop, the image will be cropped using the coordinates you have selected and will be automatically saved.
Customers can easily delete photo gallery categories, but it should be noted that this can have unwanted effects on your website. If your category is already indexed in the search engines and you delete it, the links that are indexed will become broken. This is equally true for shares of your category on social media and any bookmarks that your visitors have saved.
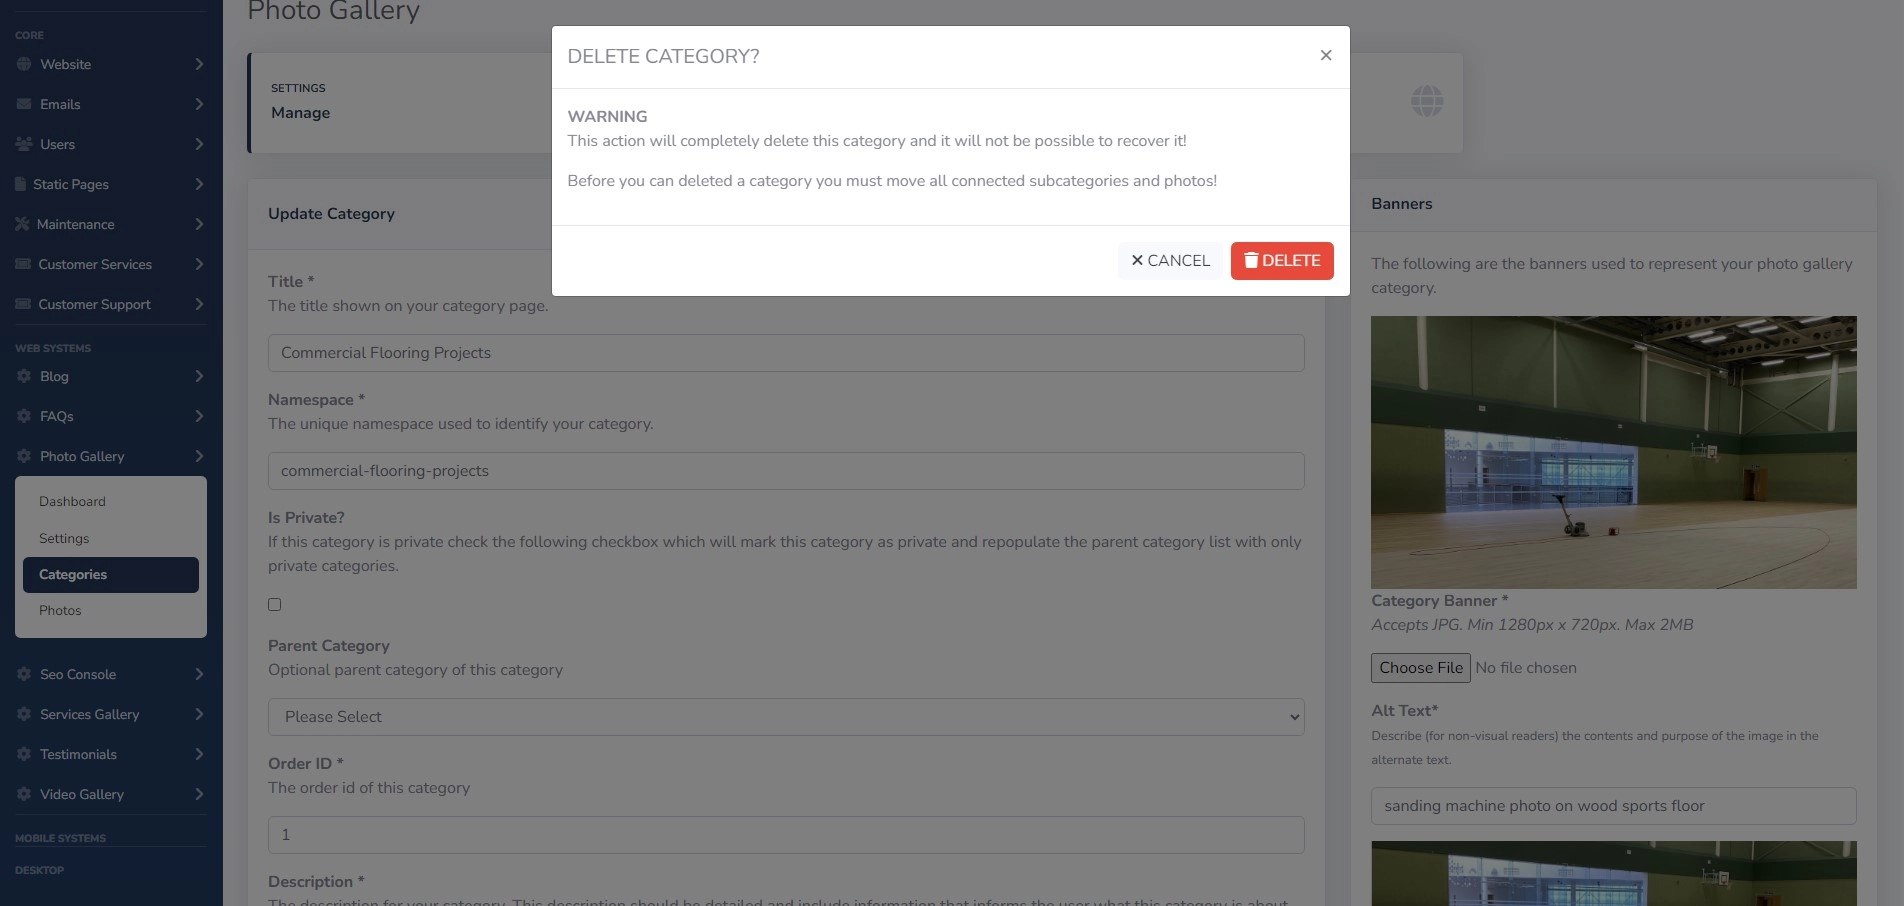
To delete a category or subcategory, visit the category edit page for the category and click on the DELETE button in the top right. A pop up warning will appear warning you that this action is not reversible, and that the category will be permanently deleted.
Before you can delete a category you need to move any connected subcategories and photos to a new location by editing each one individually. The system will not allow you to delete the category if it has subcategories assigned to it or has photos.
Once you are ready to delete you category, click the DELETE button and the category will be removed.
Have any thoughts you would like to share? Use the comments below.